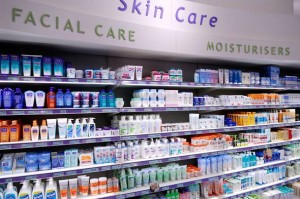
 You know that moment when you find yourself standing in the middle of the beauty aisle in Tesco, or Boots, looking through the hundreds of different moisturisers, cleansers…your boyfriend/husband/significant other is next to you telling you “c’mon, hurry up, they’re all the same”, and you look at him, and you look back at the shelf, and you look at him again, and plead with him “just one more minute”, and you look at the shelf again hoping one of the creams will just magically jump out at you this time.
 But you know it won’t because this is a decision that requires effort, and you can’t be rushed. You need to read through the back of every bottle to find that one that is just perfect for you. You find yourself reading “directions for use” at the back of every bottle, even though you know they’ll all say “apply a thin layer all over the body”, and how else would you use a moisturiser? But there’s just something inexplicable about a bottle of moisturiser, or cleanser, that just needs to be studied to the last detail (and don’t get me started on shampoos and conditioners, I could probably quote the numerous types of Herbal Essences). And the funny thing is, the better part of you knows that what the bottle says probably isn’t true anyway, but you still can’t take your eyes off it. “Must find the perfect one” – the words that run through your head as the world around you becomes blurry and non-existent…And for those few minutes, it’s just you and the writing on the bottle. That’s what beauty product shopping does to you!
Uhm, I just realized something: I hope this isn’t one of those situations where you share a thought you’ve had for ages and expect people to enthusiastically utter the words “oh, yes, I’ve always thought that” so you can have a good sigh of relief “I thought I was the only one”. But instead they look at you, with that wide eyed look, and you just know you’ve said something you shouldn’t have and the person has no idea what you’re talking about (if the latter is true in this case, I ask that you politely pretend that you know what I’m talking about).
So this week, to try and figure out how to minimize all the time spent browsing through beauty products on the shelves (which to me seems like time very well spent, but unfortunately my boyfriend would tend to disagree with me on this) I decided to go back to basics and try my luck with DIY beauty products. I figured that instead of spending time reading through every bottle on the shelf, I would just turn my kitchen into my very own beauty salon. Step One: simple! Just type “DIY beauty treatments” into Google. Step Two: tricky! Picking which ones to try! Being the DIY beauty treatment novice that I am, I decided to start with 2 simple (and yummy) recipes:
1. Dark Chocolate Mask
2. Cleopatra Bath
The ingredients for this mask couldn’t be easier to find:
• 100g of dark chocolate (you can use more if you want a thicker consistency)
• 1 cup of milk
• 3 table spoons of salt
Benefits?
Supposedly dark chocolate facial masks will leave your skin feeling firm, soft, smooth and tight. Dark chocolate is full of antioxidants which are good for skin cell repair and prevent skin cell damage. Chocolate also contains copper, iron, manganese, magnesium and zinc, which promote cell growth and repair. The salt, on the other hand, helps to kill bacteria and keep the skin clean (and it will keep you from eating the mask. I tried it-tastes horribly salty!).
How to make it?
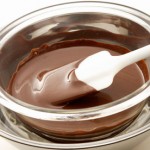
Dissolve the salt in the milk. Melt the chocolate. Now just add the milk to the melted chocolate and stir it well until you have a nice consistency. I used too much milk on my first try and ended up with an almost see through paste (I don’t know if you could actually call it is paste, it was more like really watery soup). So maybe add the milk little by little so you get the result you want before you ruin the mask and have to start all over again like I did! Wait for it to cool down a little before you put it on your face to avoid burning yourself (I speak from experience :-P). I also read that you should use a wooden spoon to spread the mask on your face, but I found it easier to just use my fingers, although it can be quite messy! And voila! Now you can just relax with the mask on for about 10-15 minutes.
 Don’t do what I did initially and decide to clean the dirty dishes in the kitchen while you’re waiting. Not only does that defeat the purpose of relaxing and pampering yourself, but you’ll also find that when you’ve finally caught up with the dirty dishes you now have to clean the lovely trail of dark chocolate mask you’ve left after you. So just go lie down and relax for a few minutes. When you’re ready to wash off the mask, just dampen some cotton wool pads in lukewarm water and use them to wash off the chocolate. Lastly, splash cold water on your face to help close the pores, so you can keep dirt out for longer.
Extra Tip: Before you put on your mask, soak a face cloth in hot water, squeeze it, and spread it over your face. The hot steam from the cloth will help to open your pores so the mask can penetrate your skin better.
Positives?
Once I allowed myself to lie down and enjoy my first DIY beauty treatment, I must admit that it was actually a lovely experience. At the start you do find yourself thinking “what am I doing with chocolate on my face?”, but as you feel the mask tightening, you know something must be working. The smell of chocolate is quite calming, which I didn’t expect, and as Natural Remedies for Skin Care put it – you find yourself feeding your senses as well as your skin.
When I washed off the mask, I guess “cleansed” and “refreshed” would be the best words to describe how I felt. And I mean that! My skin really felt like it had been somewhat purified, if that even makes sense. I felt healthy! I felt fresh! I could still smell the chocolate when I went to bed – a beautiful and indulging fragrance.
Negatives?
I did have to spend some time cleaning the bathroom after I finished washing off the mask. The chocolate mask sneakily dripped off my arm and onto the floor and my clothes. And the sink…Well, let’s just say it was a little less white than usual!
 2. Cleopatra Bath
The ingredients, once again, are easy to find. You can probably find them in your kitchen:
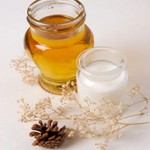
• 4 cups of full fat milk
• 1 cup of honey
• Lavender Essential Oil (or any essential oil that you like)
• Candles (very important!)
Benefits?
Milk & Honey Baths were one of Cleopatra’s famous beauty treatments, which immediately inspires a sense of curiosity in this treatment. Reportedly, this luxurious bath exfoliates, softens and nourishes the skin. The lavender essential oil is a nice addition not only due to its antiseptic properties, which are excellent for the skin, but also due to its refreshing fragrance, which helps to eliminate headaches, nervous tension, emotional stress, and anxiety. And I know we’ve all experience at least one of those!
How to make it?
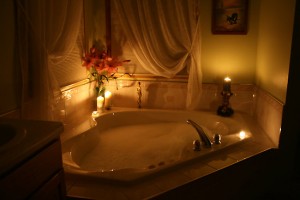
Mix the milk and honey together in a bowl, and add a few drops of the lavender essential oil. Fill the bath tub  with hot water, and pour the milk and honey mixture into the bath. Don’t forget to light a few candles and turn off the lights. This is guaranteed to create a calming ambience which helps to transform this milk and honey bath into both a body and mind treatment. Stay in the bath for about 20 minutes and when you’re ready to get out, simply pat yourself dry.
Positives?
My name is Ana and I’m a stressaholic! I always find it hard to stop and relax, and unsurprisingly spent the first few minutes of my bath thinking “am I wasting my time here? Maybe I’ve been here long enough? I should just get out…” But once I focused on the candles, everything changed! As I stared at the flickering lights, and let my mind get lost in the midst of a calming lavender fragrance and silky smooth honey and milky water, I found a place, somewhere in my mind (or in my bathroom), where I felt calm and peaceful. This is probably one of those situations in which you think I’m exaggerating, but I guarantee you I’m not. If you haven’t tried this Cleopatra Bath, definitely give it a try. It’s a special treat and so easy to achieve! The smell of honey and lavender that lingers in your skin is just delightful.
Negatives?
It’s difficult to judge what temperature you should have the bath at. First I was too cold. Struggled to reach the hot water tap with my feet to turn it on (lazy trick!) and after a few minutes I felt too hot. So I found myself playing a game of “let’s make it a little hotter, ok, no, let’s make it a little colder”, which did distract me a bit from the relaxation aspect of the bath.
I can’t say that DIY beauty products are better than the real thing, if I’m honest, but they’re quirky and it was nice to try them! These are only two of hundreds, even thousands of DIY beauty treatments available. I’m eager to try out more, but I thought I would bore you if I just went on and on and on…I hope to try some more out in the coming weeks, and report back with the results! If you have any suggestions or any other tips that you would like to share, I would very much appreciate hearing from you, so don’t hesitate to leave a comment below! 🙂
Thank you for reading, and I hope we’ll meet again next week! Ana